Making Microsculpture

Today we are excited to be opening our new special exhibition, Microsculpture: The Insect Photography of Levon Biss. You may well have already heard about Microsculpture, and have perhaps watched the video showing how Levon Biss made these incredible portraits of insects from the Museum’s collection.
As we open the show in the Museum’s main court we wanted to give a little more insight into the process that Dr James Hogan, an entomologist in our Life Collections, went through to select and describe the specimens for the project. So I put a few questions to James to explain the making of Microsculpture from his point of view.

There are 23 specimens on show in the exhibition: how did you choose these particular ones?
We wanted a wide variety of specimens that would all show some interesting surface detail. Some were also chosen for their spectacular colours, interesting shapes or strange appearance.

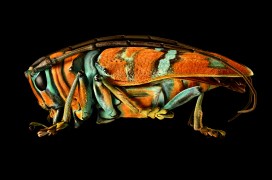
Madagascar. Length: 10 mm
But perhaps 95 per cent of the specimens we initially considered were rejected because we had some pretty strict criteria; very hairy specimens, which includes most bees, were out as the image processing was too difficult; the specimens had to be intact, so no broken antennae or legs.
Probably the biggest problem was finding specimens which were clean enough. Because Levon’s technique reveals so much detail, any dirt on the specimen is glaringly obvious. And the whole idea was to look at the surface structures, which are obviously very small and easily obscured by any dirt.
How did you prepare them for their close-ups?
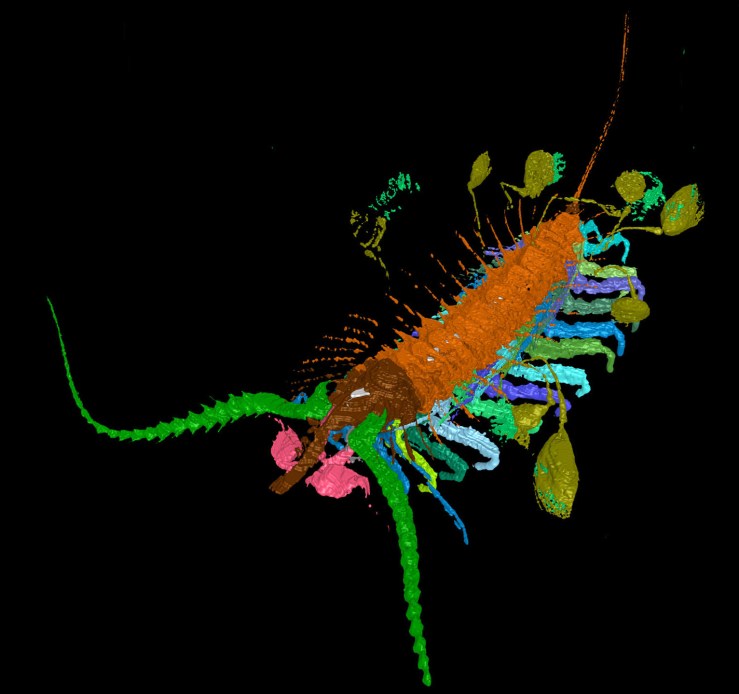
All the specimens needed a bit of preparation work before being ready for Levon’s photography. First they needed to be remounted on the end of long pins to allow more clearance space for the lighting setup. Some of the specimens are very small and fragile and this is the stage where damage is most likely to occur.
After remounting, all the insects needed at least some degree of cleaning under the microscope. For this I used a range of fine paintbrushes; we also make our own tools from micro-pins bent into different points and hooks. Again, I had to be careful to not damage the specimens – easily done by over-enthusiastic cleaning!
Where do the specimens come from?
The specimens in the exhibition are from the Museum’s very large insect collection, stored behind the scenes in many different rooms. The insects in the show are from all over the world, from a back garden in England to a remote island near Antarctica. Some were collected over 150 years ago while others were collected very recently by Museum staff.
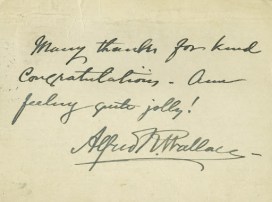
Of particular historical significance is the Tricolored Jewel Beetle (Belionota sumptuosa) which was collected by the Victorian naturalist and explorer Alfred Russel Wallace, co-publisher of the theory of evolution with Charles Darwin in 1858.

How big are the actual specimens in comparison with the photos?
The actual specimens are mostly pretty small, ranging from 6 mm to about 30 mm. Some of the larger printed photographs will be about a thousand times larger than the specimen!

What do you hope people will get out of the pictures in the exhibition?
To me insects are beautiful creatures and Levon has done an outstanding job of revealing this. I hope the photographs will spark people’s interest in insects and inspire more people to study them.
The photographs certainly pose some interesting questions, and reveal that there is so much we don’t know, particularly about the functions of all their strange and varied adaptations.
Is it valuable to showcase specimens from the collections in this way?
One of the most exciting parts of this exhibition for me was the opportunity to show part of the Museum’s collection which visitors don’t normally see.
The collection is used all the time by scientists, artists and educators, but unfortunately most of it is unsuitable for display because the specimens are so small. Levon’s ultra-high resolution photography has in a way solved this problem, allowing us to showcase some of these spectacular, but tiny and fragile creatures in all their beauty.


 The Crew is made up of eleven 14-19 year olds who are already passionate about natural history and we’re really pleased to have them on board. Many museums across the UK run youth forums to engage the young people within their community, who are often underrepresented in museum audiences.