Ubiquitous and Inconspicuous

THE INVISIBLE HISTORY OF THE MUSEUM’S GLASS DISPLAY CASES


Glass cases play an integral role in museums and galleries, but they are designed to be overlooked and ignored. In this blog post, Librarian and Archivist Danielle Czerkaszyn uses research collected by Helen Goulston (AHRC Collaborative Doctoral Partnership PhD Candidate) to uncover the invisible history of OUMNH’s glass display cases and considers how they have evolved alongside the museum during its 160-year history.


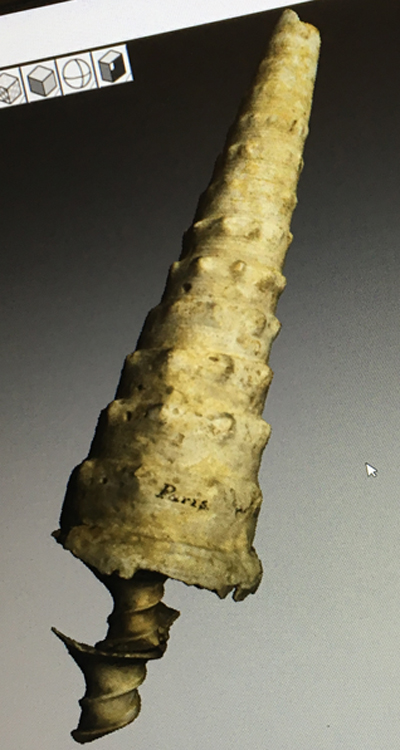
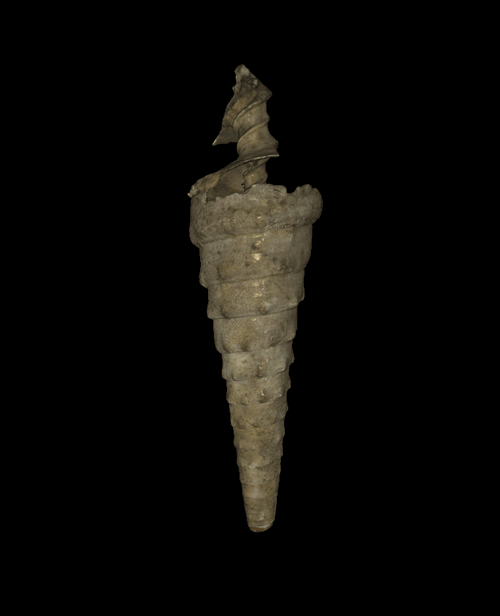
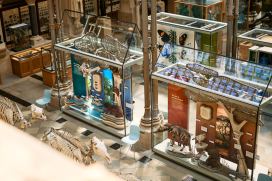
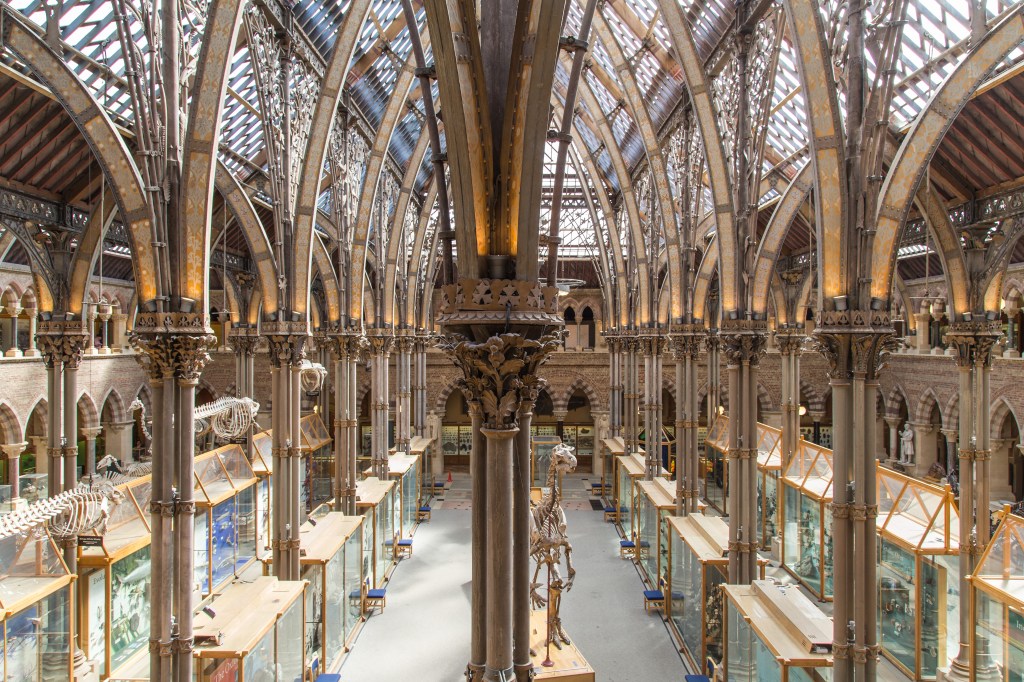
Since 2018, the Museum has been working to refresh its Main Court by installing new permanent displays. This morning, we placed the final specimen in our brand new “Open Oceans” display, concluding the latest phase of the redisplay project. The “Open Oceans” display is housed in one of eight new conservation-grade glass cases installed last year. While some visitors have welcomed the new cases, others have mourned the loss of the wooden cases or questioned why they needed to be replaced. Others have wondered why the tops of the new glass cases have roofs with different heights. To answer these questions, we need to dive into the museum archive…

A CASE HISTORY

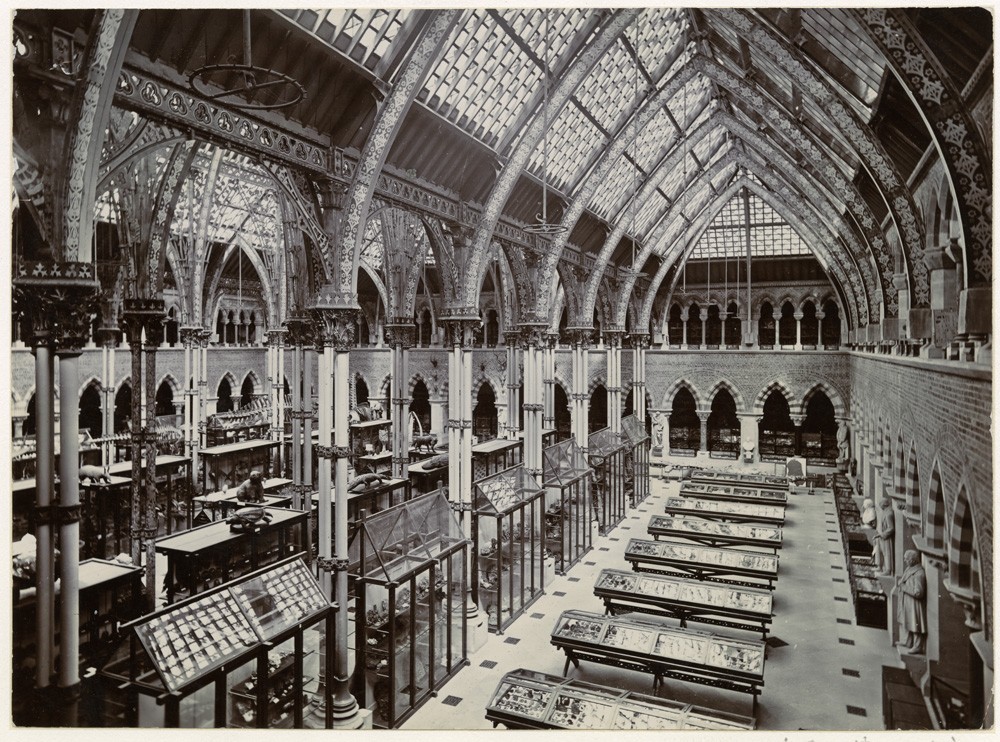
When visitors arrived at the newly-opened museum in 1860 they would have been greeted by an empty central court, devoid of displays. While the fabric of the building was more or less complete, and preparation for the installation of displays had already begun, the university’s scientific and natural history collections had not yet been transferred to the building.

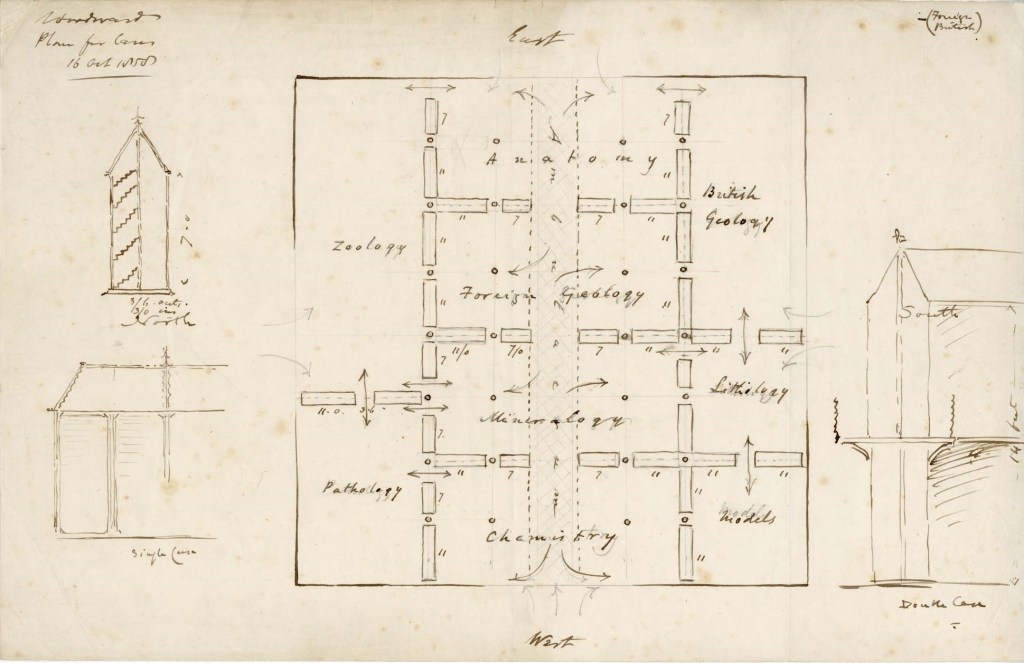
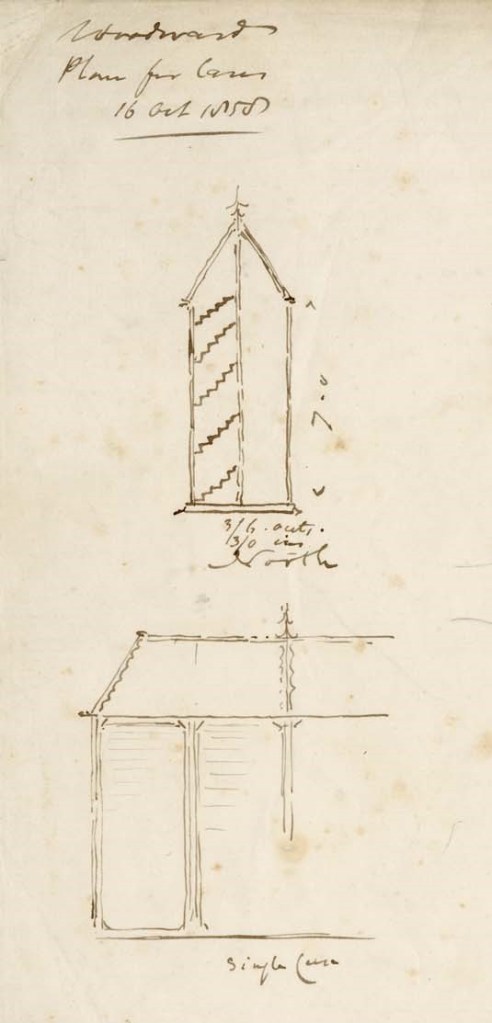
A sketch in the archive dated 16 October 1858 by architect Benjamin Woodward shows an early plan for the display cases to be arranged between the iron columns in the Main Court, allowing visitors to circulate among the exhibits, with display cases echoing the Gothic revival architecture. The right of the document shows grand double-height displays with a central balustrade that were never realised, but cases similar to those on the left would be ordered in January 1862.

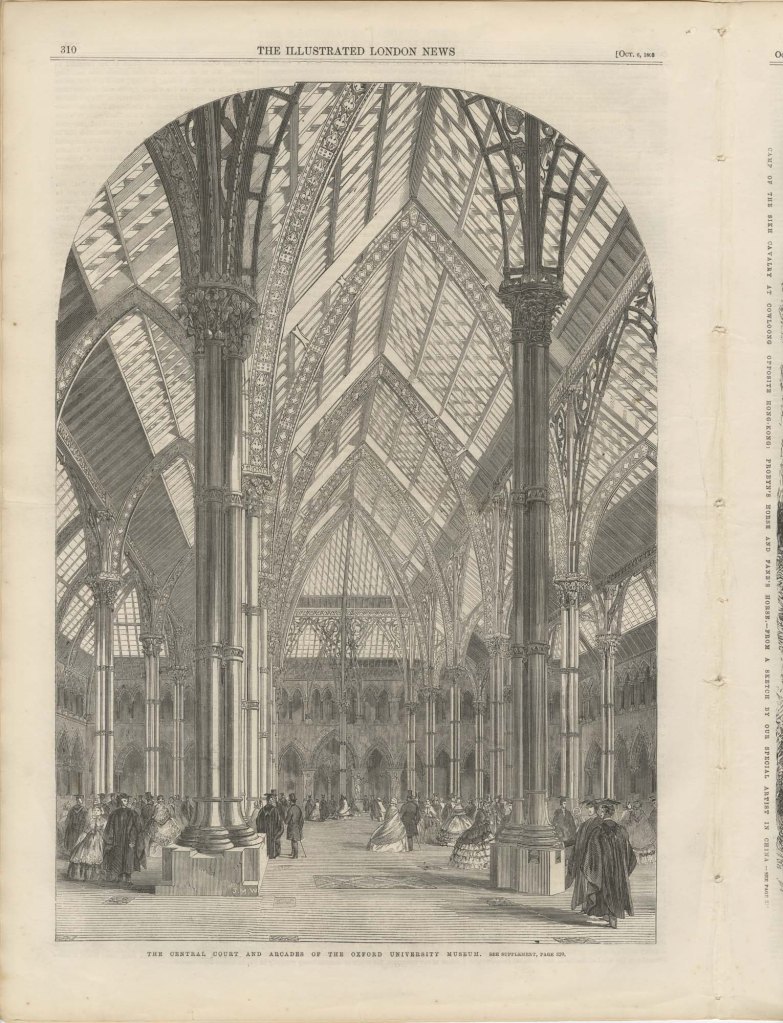
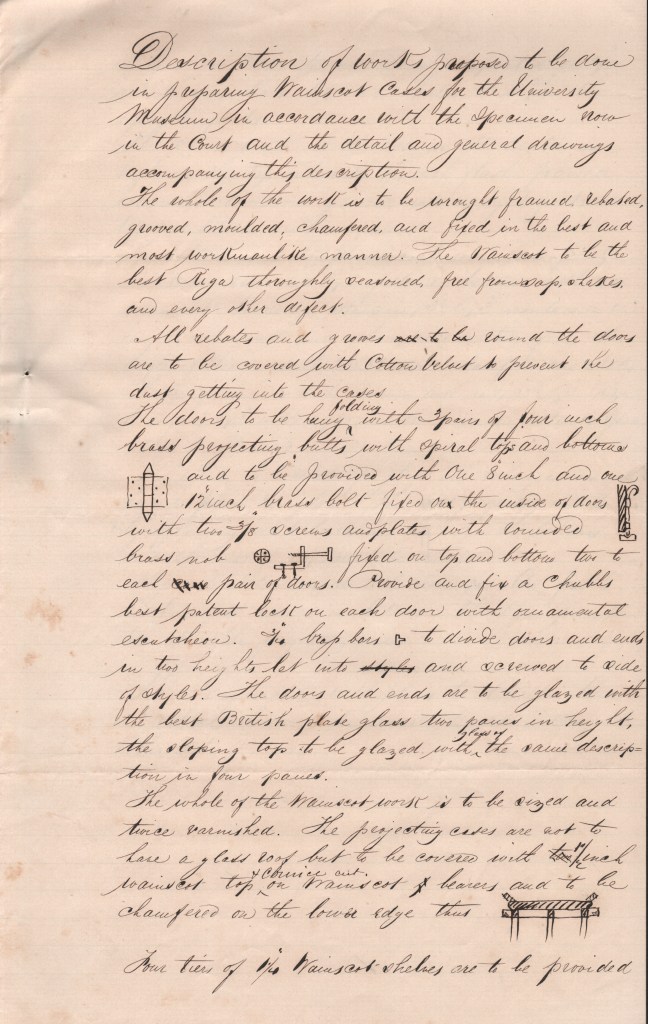
The 1862 tender document written by William Bramwell, Clerk of Works at the Museum, shows two types of upright display cases ordered for installation between the iron columns — some with pitched roofs and others with flat tops, which were considerably cheaper. Though the design of the cases resembles Woodward’s original sketches, the tender included detailed specifications that addressed the practicalities of displaying specimens, such as cotton velvet door linings to stop dust from getting in.

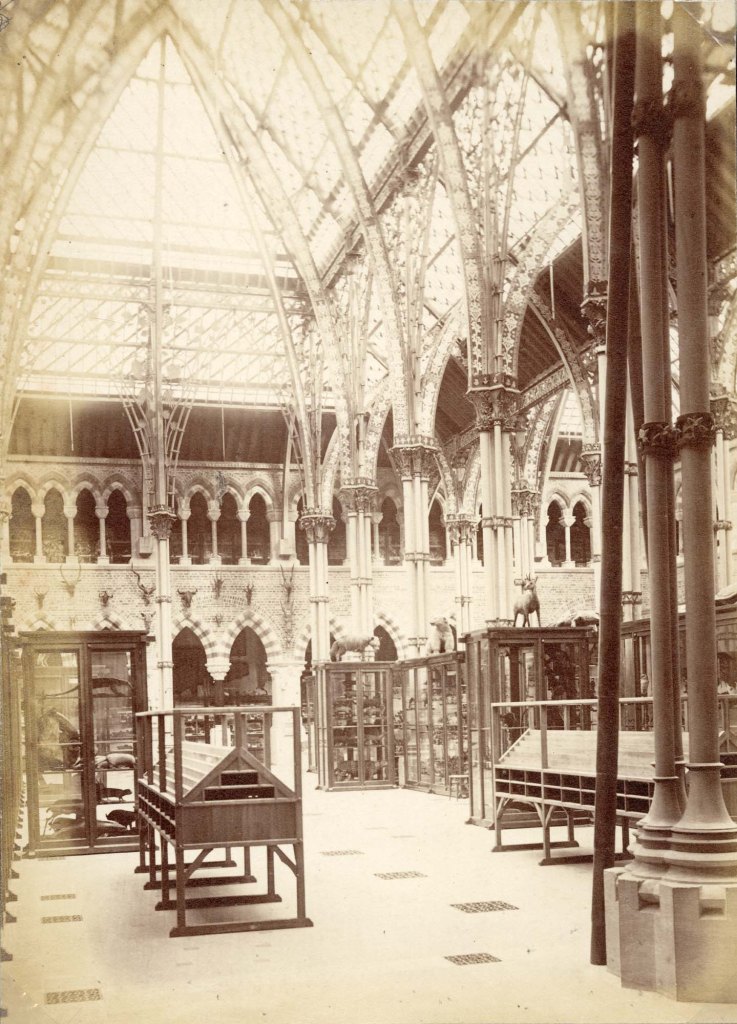
In addition to the upright centre court cases, ten table cases were ordered from the high-end London cabinet makers, Jackson and Graham, at a cost of £344.10. The same firm was also commissioned to fit the tall wall cases in the outer corridors. Plans and photographs from the archive show that the installation of these cases was piecemeal and it wasn’t until 1866 that all the display cases were fully in place.

WHY REPLACE THE CASES?

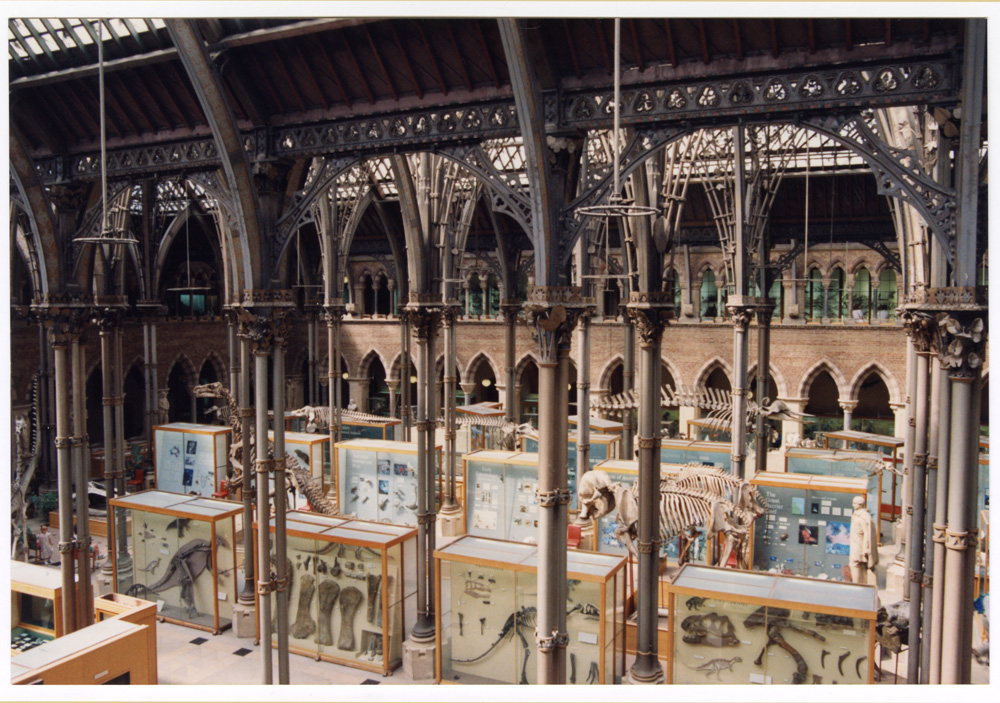
The wooden display cases that we have been replacing may look old, but few of the original cases from 1866 survive. While some of the old display cases were moved behind the scenes for preservation, others found homes in different museums or were disposed of when they were beyond repair. The most recent timber-framed cases in the Main Court are 20th-century replicas that have been heavily modified, particularly in the late 1960s-early 1970s, and again in the early 2000s when the clear acrylic roofs were added. Some of these modifications affected the stability of the cases, particularly when the doors were opened, making them unsafe for staff to access. Other modifications meant the cases were no longer dust or pest-proof, which poses a risk to specimens.

As these wooden display cases neared the end of their life, the museum and Oxford University Estates worked with Oxford City Council and Historic England to approve the replacement of the cases and ensure the redevelopment was historically sensitive to our Grade 1 listed Victorian building.

For this reason, the new cases retain the original 1866 arrangement and are built to the same dimensions. We have also returned to the original form, including outer aisle cases with alternating pitched and flat roofs. It was decided early on that the new cases would not be lined in wood because timber can be detrimental to the conservation of certain specimens. However, the design of the edges of the new cases sought to mirror the craftmanship of the 1866 cases by emulating the beading on the edges – albeit much more subtly, and in bronze rather than timber – complementing the colours of the ironwork in the museum roof.

A CASE FOR THE FUTURE

The new glass cases are built by museum showcase experts ClickNetherfield and provide a stable, pest-proof environment for our delicate and historically important specimens. Their design artfully captures the character of the museum building, while still focusing the visitor’s attention on their contents. It is hoped that the new displays will last for at least another two decades, and the cases even longer. During that time, millions of eyes will be cast over our displays, but the glass cases that protect them may barely even be noticed.


“The True Nature of Nature Itself”

MAKING ART WITH SWIFTS FROM THE MUSEUM’S COLLECTIONS


Between 14th May and 21st July, the mixed media artwork Fly Over My City was on display at the Museum of Natural History, delighting visitors with a visual and auditory exploration of swifts and the threats they face in urban environments. In this blog post, artist Becca Jeffree discusses working with Museum collections to create the piece, and the value of museums as venues for combining art and sciences.


While studying at London’s Natural History Museum years ago, another student had become upset with a group of artists who were drawing from the floor of the birds gallery, blocking his way. Studying birds in a cabinet was not as worthwhile, he felt, as studying in the field. Moreover, drawing seemed to him out of place within a science museum. Yet sketching specimens has historically played an important role in learning about biodiversity, and is particularly important for those whose access to wildlife is restricted.

Perhaps it is unsurprising that this discord arose in a natural history museum. Art is often separated from science in society and culture, with science tending to dominate debates about understanding nature. Museums, however, are rare places where art and science are welcomed equally and beautifully combined. Few places embody this better than Oxford University Museum of Natural History — a work of Victorian art shaped by the idea that art and science can take one another to higher levels. As historian John Holmes puts it in The PreRaphaelites and Science, the building expresses the “true nature of nature itself” through its architecture. It is a place where the study and interpretation of the natural world are cross-disciplinary.

Fly Over My City (2023) by Becca Jeffree, on display at the Museum of Natural History

I recently collaborated with the Museum when making my artwork about the built environment and the common swift (Apus apus). Swifts are transient animals and as they rarely land they are difficult to see up close. They are found in the UK for only a short time each summer, fly fast, and are in decline. Through access to the Museum’s avian collections, I had a unique opportunity to see swift bodies up close and observe them in detail through drawing. Most of the specimens are bird skins; the skin, plumage, wing bones, skull and feet are preserved but not the internal organs, and they are not mounted like the ones we often see in cabinets. When I handled the swifts, I was asked to wear gloves to protect the specimens and avoid exposure to any harmful chemicals that may have been used to preserve them. Even though I couldn’t touch the swifts directly, I could still get to know their weight, size, colour, and notice interesting details like the shape of their chest feathers which are similar to their hummingbird relatives’.

Photographing, sketching and studying swifts from the Museum’s collections

Having physical access to museum specimens allowed me to root my artwork more in science, but also to draw out further layers of meaning, by responding to my own feelings and senses. The materials I included in the work – charcoal and tracing paper – were inspired by the swifts’ weightlessness, their texture, colour and the urban environment they often inhabit. The PreRaphaelites, whose worldview infuses the Museum building, regarded art as a valid investigative method. As John Holmes puts it, “if observation yields a true knowledge of nature, then making art that records and synthesises these observations is at once a disciplined method for conducting research and the best means to convey that knowledge.” I am grateful that the Museum continues to embrace this idea today, and for the value placed on artists as researchers and communicators of its collections.

Charcoal sketch of swifts, made using Museum specimens. From Fly Over My City (2023)

Visit Becca Jeffree’s website to find out more about the piece, and her other artwork

Museum’s Mary Anning Fossil Gets Stamp of Approval


200 years since OUMNH’s very own Megalosaurus fossils were used in the first scientific description of a dinosaur, the Royal Mail has launched The Age of Dinosaurs, a two-part series of commemorative stamps. The stamps include one series of palaeo-art reconstructions of Mesozoic dinosaurs and reptiles and another series celebrating Mary Anning (1799-1847), a self-taught anatomist and fossil preparator, and one of the most important figures in early geology.

Dr Emma Nicholls and colleagues discuss some of the fascinating stories behind the species and specimens featured on these stamps.


Megalosaurus stamps

Two of the stamps in the Age of Dinosaurs stamp set include artistic reconstructions of Megalosaurus by the palaeo-artist Joshua Dunlop. The animal that nineteenth-century naturalists once understood to be a lumbering long-legged lizard is now depicted as a fearsome Jurassic predator that ran on its hind legs and tore into prey with its large serrated teeth. Dunlop shows Megalosaurus wading through shallow coastal waters, preparing to pounce on Cryptoclidus¸ a plesiosaur that lived alongside Megalosaurus in Jurassic Britain. The artwork also shows Megalosaurus covered in feathers. Although we don’t have any direct evidence that Megalosaurus was a feathered dinosaur, feather-like filaments have been found among the fossils of other dinosaurs such as Sciurumimus, meaning it is highly possible that Megalosaurus had feathers too.

Dapedium stamps

OUMNH collaborated directly with Royal Mail to help produce the Age of Dinosaurs miniature sheet, which showcases fossils collected by Mary Anning. One of the stamps in this collection features a photograph of the fossil of an extinct Jurassic fish, Dapedium, which is housed at OUMNH.

Despite Anning’s illustrious reputation, it wasn’t always known that this Dapedium specimen was connected to her — all that was known about it was that it had probably once belonged to William Buckland and had been collected from Lyme Regis.

Although Anning is one of the most prolific fossil collectors to have worked in Lyme Regis, naturalists like Buckland often visited Anning to go “fossicking” together, or purchase fossils from her. There are very few archival records of transactions between Anning and other fossil collectors from this time, making it difficult to decipher exactly who extracted fossils such as this, found in nineteenth-century Dorset.

Fortuitously, while Dr Sue Newell was conducting research for her PhD on the Buckland Collection in 2021, she found an exciting letter in OUMNH Archive, dated 3rd September 1829. It was from a former student of Buckland’s, Beriah Botfield, and contained details of two fossils that Buckland had bought from Anning to present to the University of Oxford. Using evidence in the letter, Sue was able to work out that Botfield was referring to a Dapedium fossil which she later recognised tucked away in OUMNH’s fossil store.

Botfield had had the fossil mounted in an expensive (and very heavy!) stone frame, with “Presented by Beriah Botfield Esq. Dapedium politum. Lyme, Dorset” beautifully inscribed on the front surface. At the time, the identity of Anning as the fossil’s original finder, identifier, preparator and vendor, was probably common knowledge and, typically, Botfield did not consider these facts important enough to record on his presentation frame.

The Dapedium fossil is a near-complete example of this Jurassic fish, in which scale patterns and delicate fin structures are preserved in breathtaking detail. Dapedium is the first OUMNH object to grace a Royal Mail stamp – an ideal choice given its scientific and historic importance.


Visit the Museum to see the Dapedium fossil as well as temporary displays about the new stamp collection.

Find out more about our special programme of events, exhibitions, and activities honouring Megalosaurus in 2024: The Oxford Dinosaur That Started It All.


Attack of the Space Spider

Wondrous things have been going on in the Charles Lyell Project recently! I have been using a really cool piece of kit that uses structured light scanning to produce a 3D image of the fossils. The best thing is it’s called the Space Spider and looks like a gadget from Star Trek, maybe a high tech whisk or iron. Using this, and a very helpful assistant, you can produce a complete 3D image in 15 – 40 minutes depending on how large and complicated the specimen is and how many times you mess up (assistant sold separately).

cl-04321
This is what you can create!

So for anyone who has, or now wants to have, a Space Spider (and the Artec Studio 11 Professional software that goes with it) this is how I used it…

1. Be patient

It takes quite a long time to warm up. It will say it has 10 minutes left which is actually about an hour. Bring a book or something to do. It is worth the wait.

If you are dealing with large specimens or complex specimens the scans will take up a lot of memory meaning occasionally the program will freeze.

2. Scan as much as possible

In your first scan you want to cover as much of the specimen as possible to make it easier when it comes to alignment later. We started off with two complete scans of the specimen in two different orientations, adding more later if necessary, unless it was obvious we had missed something.

Using the real time fusion setting makes it much easier to see when scanning.

3. Just because the machine is high tech doesn’t mean you need to be

It is easier to put the specimen on something that rotates such as the turntable baker’s use to ice cakes. We did not have this so instead we used a plastic box. However we noticed that we were losing tracking more often than we were before. It was because of the box being reflective (this was also seen when it reflected off rings). So we used powder free vinyl gloves to cover the box solving the problem.

IMG_0331.JPG
High tech meets very low tech

4. Get rid of the floaters

There is often some noise generated by the scan, whether it has picked up a bit of table or you accidentally scanned your finger when turning the box. This can be removed in the editing part of the software. We found using the lasso or rectangle to be the easiest. Doing this after every scan rather than after scanning is complete will make it easier.

Don’t worry about getting every single one, you can get rid of the rest later using the small object filter!

5. Alignment

It was usually a bit of trial and error with the alignment but if you have done two really good scans you can get it in one go. To align you set similar points on the two scans, it is best to aim for 3 but has worked with 2.

One silly mistake that is really easy to make (especially when you are tired) is putting the points on and pressing apply without actually aligning them. Back to the beginning you go!

ALIGN.jpg
Three points used to align the two scans

6. The thing you have to do and I don’t know why

Globally register the scans. I don’t know what it means or what it does but you have to do it before you can move on.

Don’t question, just do.

7. The rest of the tools

After globally registering your scans you can use the other tools.

First: Fast fusion. There are two other types of fusion, sharp and smooth, but this one is much faster and gives good results. Only fuse the scans without texture as you add this later.

Second: Small object filter. This gets rid of any pesky floaters still remaining after fusing.

no-texture
Specimen before hole filling, looking pretty good though

Third: Hole filler. Does what it says on the tin, fills any holes that are in the scan. This is particularly useful for apertures of gastropods as the scanner can’t always get into them.

8. Weird lumps

So you have fused your scans, got rid of holes and the last standing floater but oh no there’s a weird lump on your scan that’s not on your specimen, disaster! Don’t fear the smoothing brush is here. In editor there is a smoothing brush (located above erase) which you can adjust the size of and get rid of any pesky lumps and bumps.

9. Going back

If none of the above has worked to fill a gap or there’s an odd bit go back and add another scan. Then repeat stages 2-8. If not move on and feel proud that you got it in one go.

10. Adding texture

At this stage you should have a beautiful 3D model but it will be one solid colour, not like the outside of the specimen at all. So to get the specimen looking its best you go to the texture tab. Highlight the scans that you want to use. The standard and recommended settings work well for this.

It will save your project. This is the point you feel glad that someone remembered to save it. This bit takes a little while (not more than 5 minutes) so you may want to refer to the book or activity from before.

You can use the sidebar to change brightness, saturation and other fun things. The most entertaining setting to play with is the hue; you can make the specimens any colour (even making them look mouldy).

Once you are happy, apply it.

With texture.jpg
This is with texture added

11. Save again

Pat yourself on the back for remembering.

12. Export

Exporting scans in a PLY format will give you the scans without the texture.

I recommend exporting meshes which has the texture export format as jpg. This gives you a PLY file with texture this time.

13. You’re done

Well done you have reached the end. My record was 15 minutes.

cl-01082

Just a few final tips:

  • Remember to press apply so you don’t lose the changes you have made
  • Try to remember to save as you go along
  • Play with the settings until you find what you need
  • Don’t be afraid of trial and error
  • If it freezes just give it a minute, it usually comes back.